Micro-Tracking: You shall not pass. (Until you close this tiny item)
Dec 9, 2025

Hello! This is the third part of my big article, and today I’m sharing a link to my design-cheat sheet templates that help me break down and track the progress of design tasks right inside Figma. I’ve published them in Figma Community. All templates are completely free, and you can use or modify them however you see fit or find convenient.
Why do you even need these templates?
Somewhere in an ideal world (maybe on the planet TRAPPIST-1e), a designer has only one current task — it’s fairly straightforward and involves minimal uncertainty. Working on it is easy and simple; the designer remembers all the processes and calmly keeps track of their progress in their head.
But in the real world, things are quite different. There are often multiple tasks, and even if they all relate to the same product, tracking their execution in detail can be quite challenging. Creating separate subtasks in Jira for every single step of the design process is a sure way to drown in bureaucracy, sacrificing the time allocated for the actual task.
I believe a designer’s mind should be used for thinking, not for memorizing.
That’s why I created this set of cheat sheets for myself — I don’t want to overlook anything, I want to remember every necessary step like a robot. At the same time, I need quick access to them right inside Figma, next to the mockups. This makes it more convenient for me to work; I don’t have to remember thousands of details while working on new designs. After completing a stage, I simply toggle the switch in the instance of the components I’ve assembled, and the checkbox for the selected stage of the design task switches to “Done.” I no longer need to be distracted by completed stages and can fully focus on the current process.
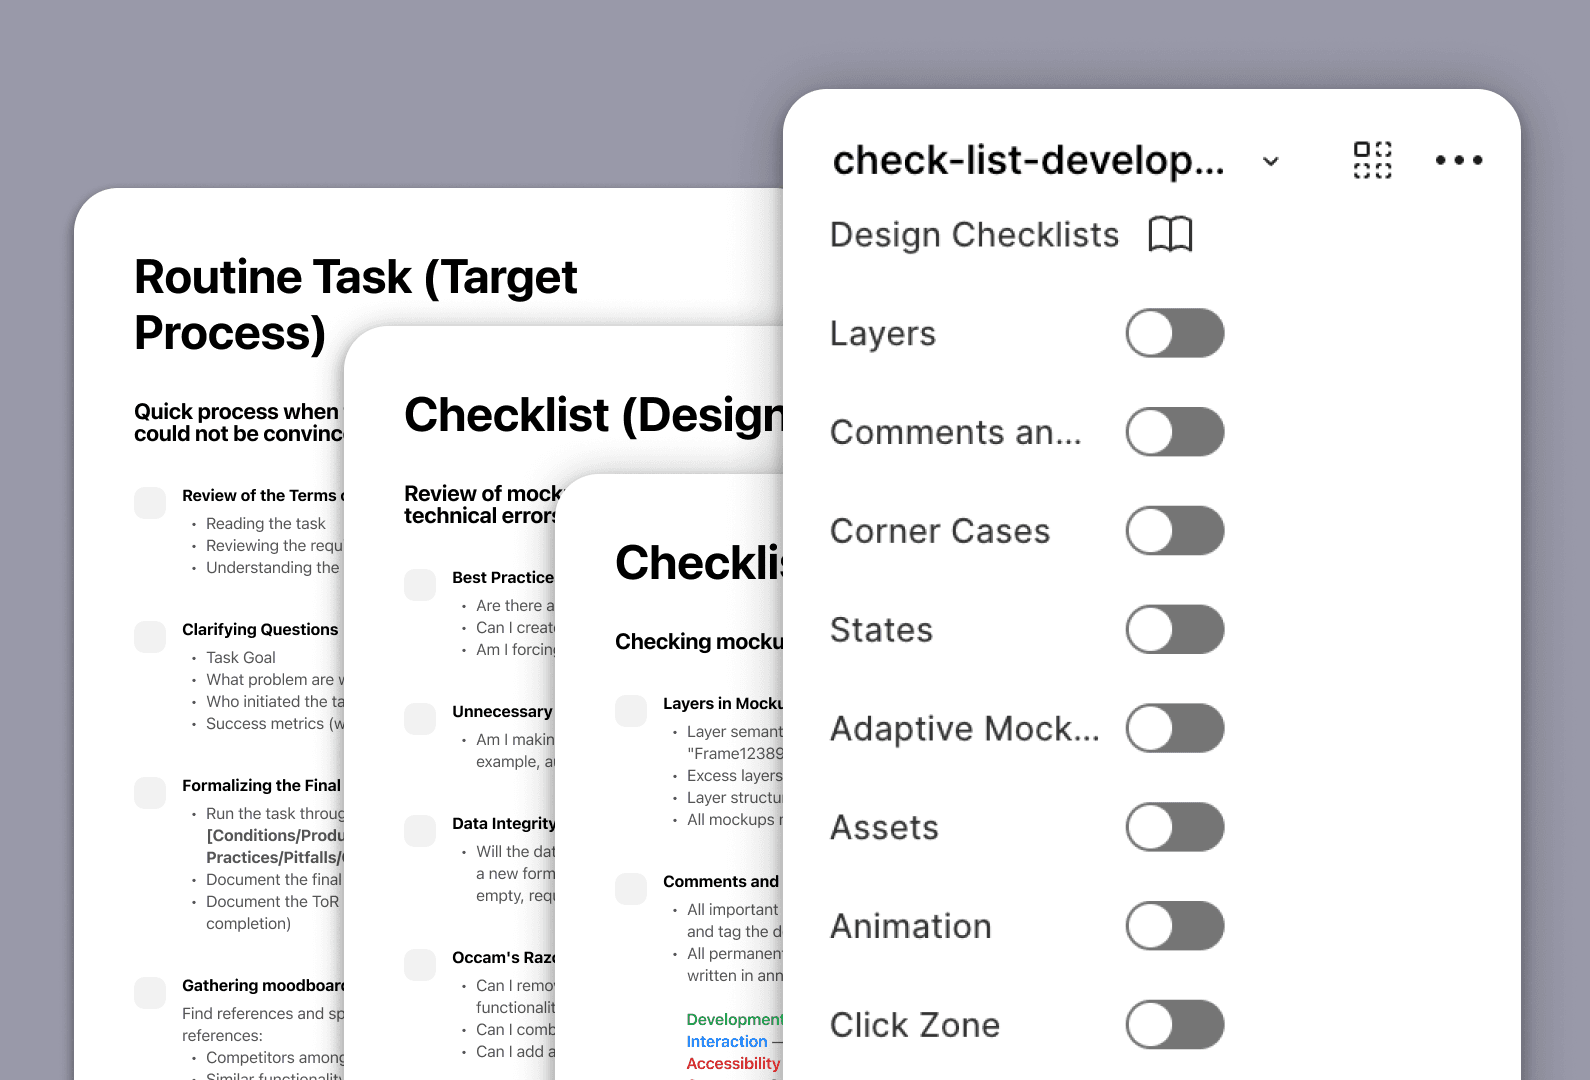
I made 3 such checklist templates:
Routine Task (Target Process)
Design Checklist
Development Checklist
I place the checklist section itself next to the high-level mockup of the feature currently being worked on. Usually, somewhere nearby, I also place a copy of the approved requirements document and summaries from research results/key insights. They help me "meditate" while looking at my mockups. When all the checklists are ticked off and the task is successfully completed, I simply delete everything unnecessary.
Design processes are set up differently in every team, and you might have items that I don't, or you may find it necessary to provide a more detailed description of certain stages. All of this can be done in the parent component. The number of steps and stages may vary, but I wouldn't recommend drastically shortening this list.
Most importantly: never start designing immediately after reviewing the requirements document, without researching the market and competitors. If you skip these stages upfront, you'll end up spending much more time on them later when it turns out your product lacks competitive advantages and poorly addresses user needs and business goals.
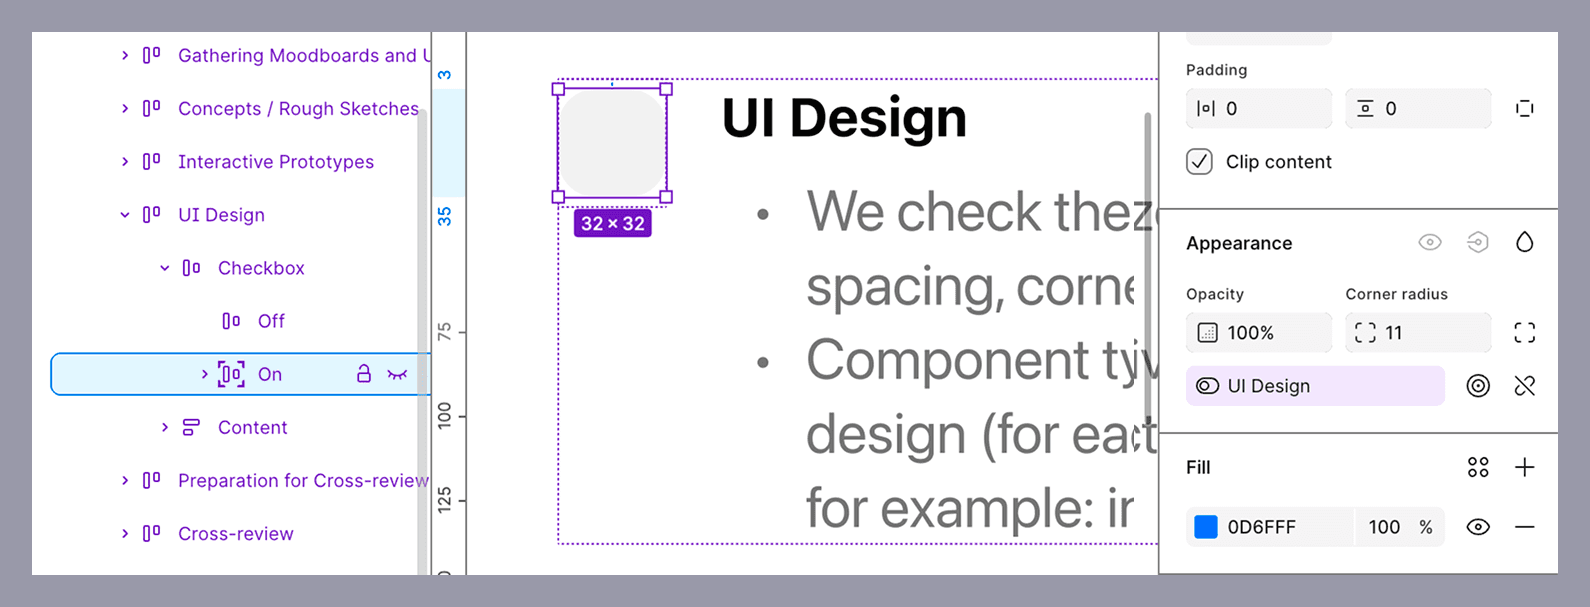
Due to the peculiarities of setting up and displaying nesting in component instances in Figma, to avoid an additional accordion with item names for each togglable checkbox, I used a Boolean value to control the display of the ticked checkbox itself. This ticked state isn't a separate component; it simply appears on top of the unticked one and has the same name as the item from the list. The description might sound a bit complicated, but it's actually quite simple :)
You can grab this set of design cheat sheets for yourself via the link: Design Checklists
Share your own secrets for decomposing and micro-tracking tasks, and stay tuned for updates — there will be a lot of interesting content!
P.S.
The first template contains many useful links to various resources for collecting references, depending on the type of product. Those who read to the end — now know about them! :)
Contacts
Interested in working together?
If it seems to you that we are on the same wavelength, feel free to drop me an email:
I believe in the Spaghetti Monster
He does not allow me to work with representatives
of the gambling/porn industries as well as with Russian government agencies
I’m Sorry 🤷🏻♂️
Alexey Yarkin © 2025
